You can now spruce up your wall by repurposing the things you can just find lying around your house. I have read about home interior designs and learned that family pictures and awards should not be in the living room. So, this is what I did…


Next step, sketch and paint. Stick to the colors used on the original wall art. By the way, I just borrowed my son’s coloring materials. Lol!

Make another one that is the same but reflected or mirror image of the nature wall art. Expect that they won’t be exactly the same but at least they are look-alike.

Blow dry and frame. For the frames, I repurposed the ones that are used to hold my husband’s certificates. The certificates were kept along with our personal files.

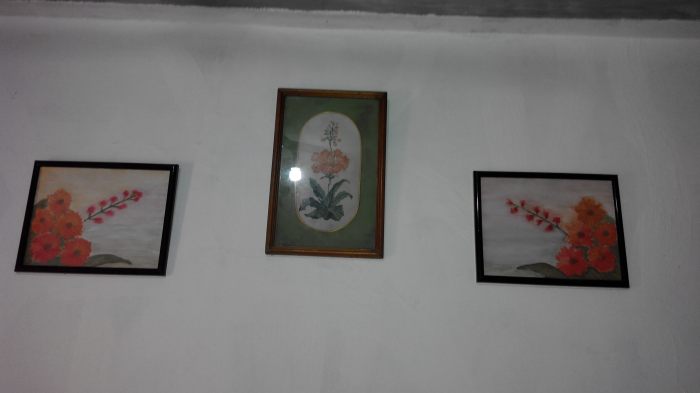
And here are the finished products… Inexpensive but valuable home projects. But what makes my projects more priceless is to see my kids happy with them.


I have this framed cross-stitch project from my sister-in-law since we moved in to our own 40 sq. m. house. I think she just gave it to me coz there’s no way she can keep it with care coz she’s only renting a room near her work. I mounted this between my husband’s certificates from work coz I also had nothing to put on the bare wall.

To start with the process in making customized framed wall art, I chose a concept that matches the existing wall decor - flower...and the color scheme as well - green and orange.
Based on what I learned during my Visual Arts major in high school, the subject style of the cross-stitch is Impressionism - wherein the art depends on the eye of the beholder whether the flower is a Gumamela or Santan, etc. Impressionism is a style of art that recreates the artist's or viewer's general impression.

Next step, sketch and paint. Stick to the colors used on the original wall art. By the way, I just borrowed my son’s coloring materials. Lol!

Make another one that is the same but reflected or mirror image of the nature wall art. Expect that they won’t be exactly the same but at least they are look-alike.
Blow dry and frame. For the frames, I repurposed the ones that are used to hold my husband’s certificates. The certificates were kept along with our personal files.

And here are the finished products… Inexpensive but valuable home projects. But what makes my projects more priceless is to see my kids happy with them.

No comments:
Post a Comment